Quick Start Guide for Super Speedy Imports
The vast majority of imports can be converted to work with Super Speedy Imports quickly and easily. Below you’ll find the steps you need to take for most imports.
Table of Contents
Create your taxonomies
We don’t yet have the built in feature to create taxonomies for you – e.g. if you have product attributes like Size or Colour, you should go to Products > Attributes and add the taxonomies there first. Note: You do not need to create the terms (e.g. red, white, large, small) as Super Speedy Imports will create the terms for you.
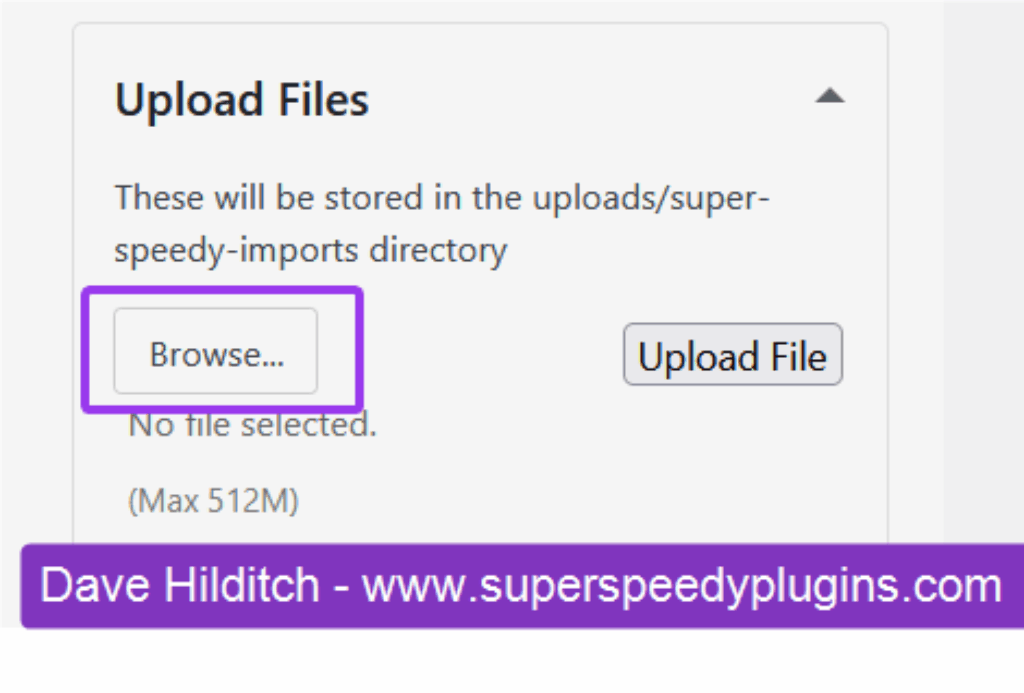
Upload your CSV file
Go to Super Speedy > Super Speedy Imports in your wp-admin sidebar and click to Expand the Upload Files section. Then click Browse to choose your CSV file. (We currently accept comma, tab or semi-colon separated files. JSON and XML support coming soon – workarounds already available – come chat on Discord)
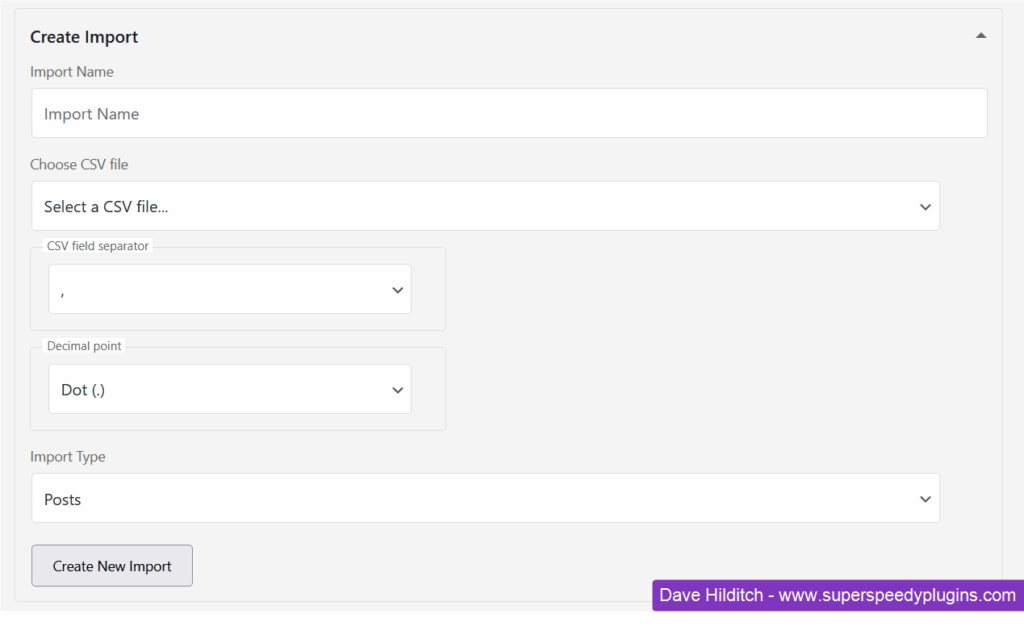
Create your import
When you upload the CSV file, the Create Import section will automatically expand. Enter a name for your import, confirm the CSV file is selected, choose your field separate (tab, comma or semi-colon) and choose what type of decimal points are used in the file. Finally – don’t forget to choose the Import Type – currently Posts, Products or Custom Post Types are available.
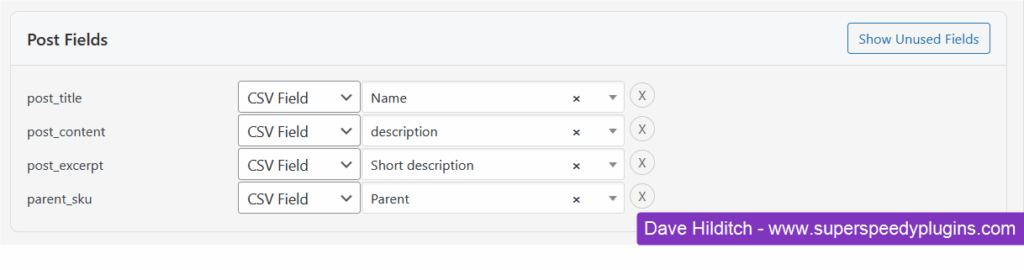
Configure your post field mappings
Choose which field is used for the post_title, post_content, post_excerpt and if you are using variable products choose which field corresponds to the parent_sku. You can configure additional fields if you wish, but these are the most commonly required.
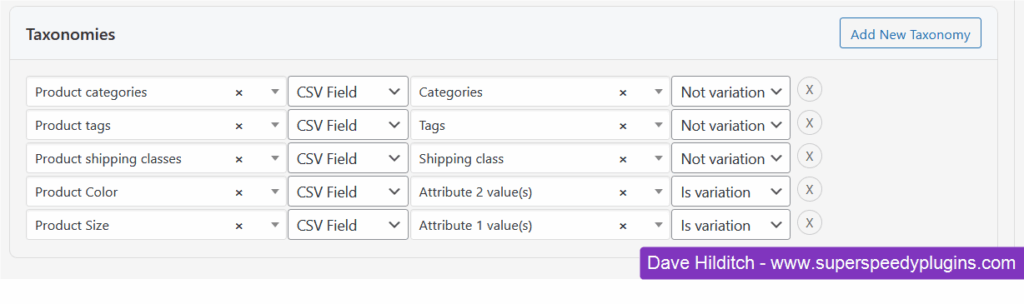
Configure your taxonomies
Click the Add Taxonomy button, then configure which taxonomy you wish to add and which CSV field it corresponds to. If you are importing product variations then choose which of these attributes is used for variations. The plugin automatically figures out which products are simple or variable based on these fields.
Configure your post-meta fields
Your post-meta is where things like SKU, prices, stock levels and more go. Click the Add New Meta Field button and type which meta field you wish to add and choose which CSV field it comes from.
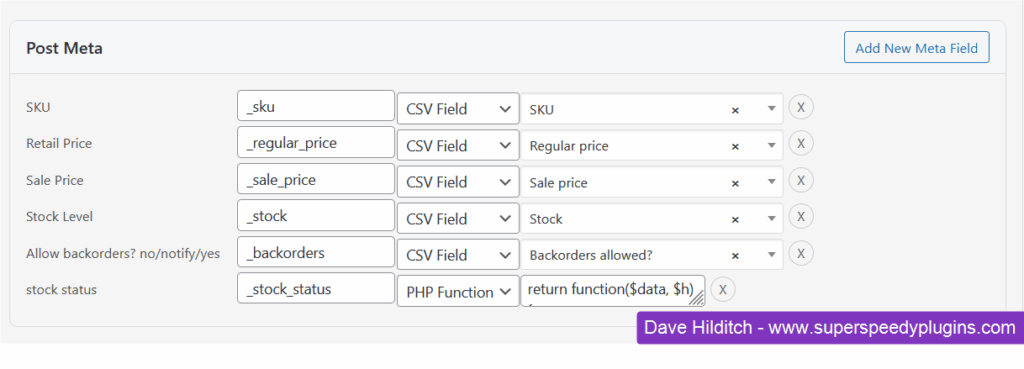
Currently – stock status is calculated using a custom function. This will be integrated into the plugin very soon, but for now, for stock status change CSV Field to PHP Function and paste this function into the box but change ‘In stock?’ to ‘Your csv column name’
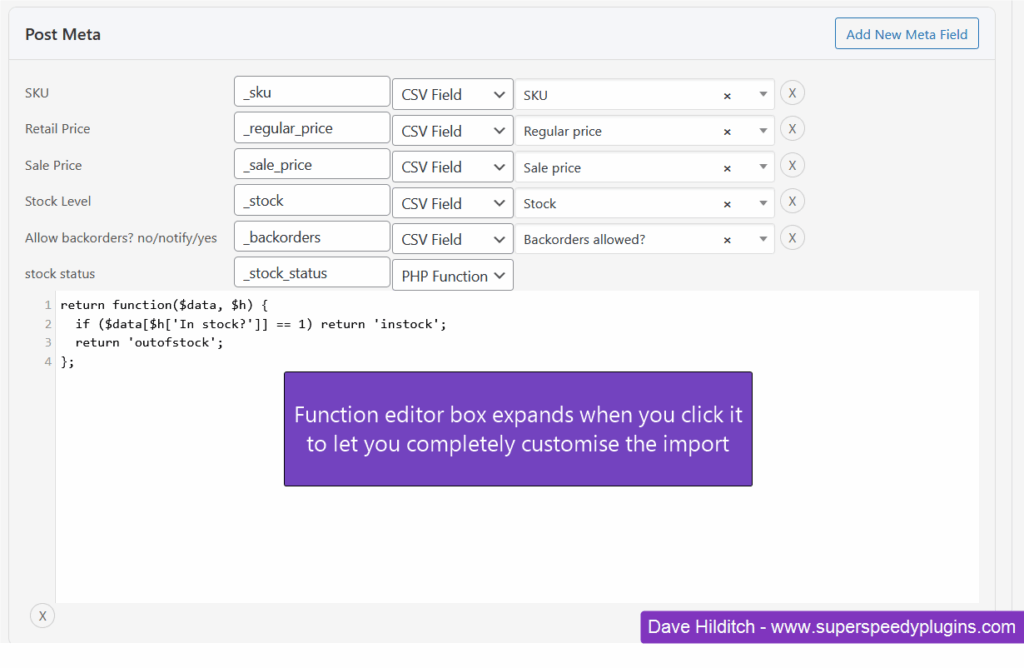
return function($data, $h) {
if ($data[$h['In stock?']] == 1) return 'instock';
return 'outofstock';
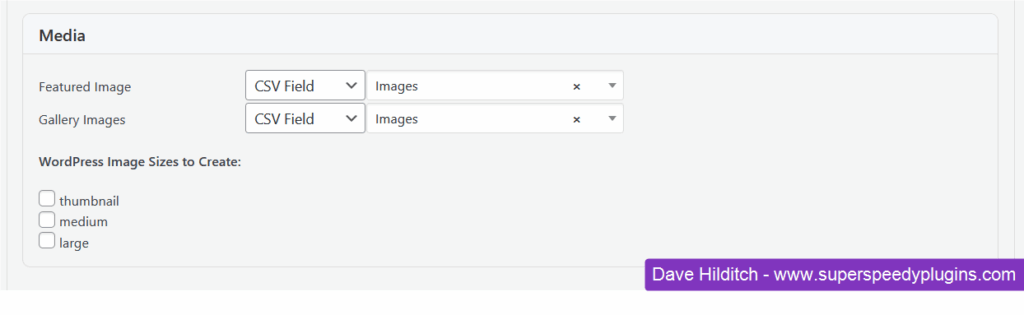
};Choose your featured image and gallery fields
If you just have one source field with pipe or comma separated image URLs, you can put that into both image fields and the Featured Image will be the first image from the list.
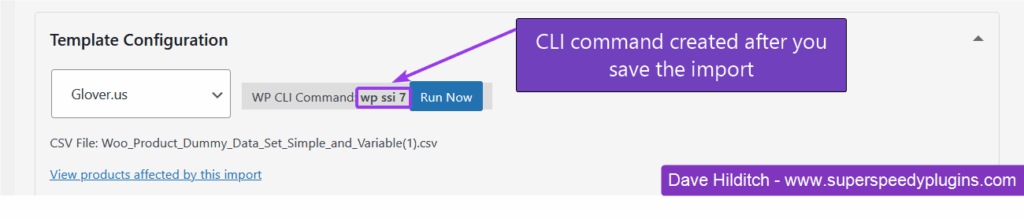
Save the import
Click the Save Import button and when you scroll to the top you will see the WP CLI command has been generated.
Run the import
Log onto your server and copy paste the WP CLI command and run that from inside your web folder.
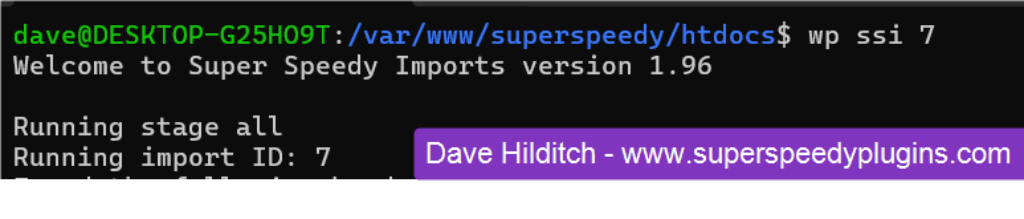
If you do not know how to use WP CLI, ask your hosts. WP CLI is amazing for helping you manage your server. If you do not wish to use WP CLI, you can just click the RUN button but the ajax might time after 30 seconds so it’s better to use WP CLI.
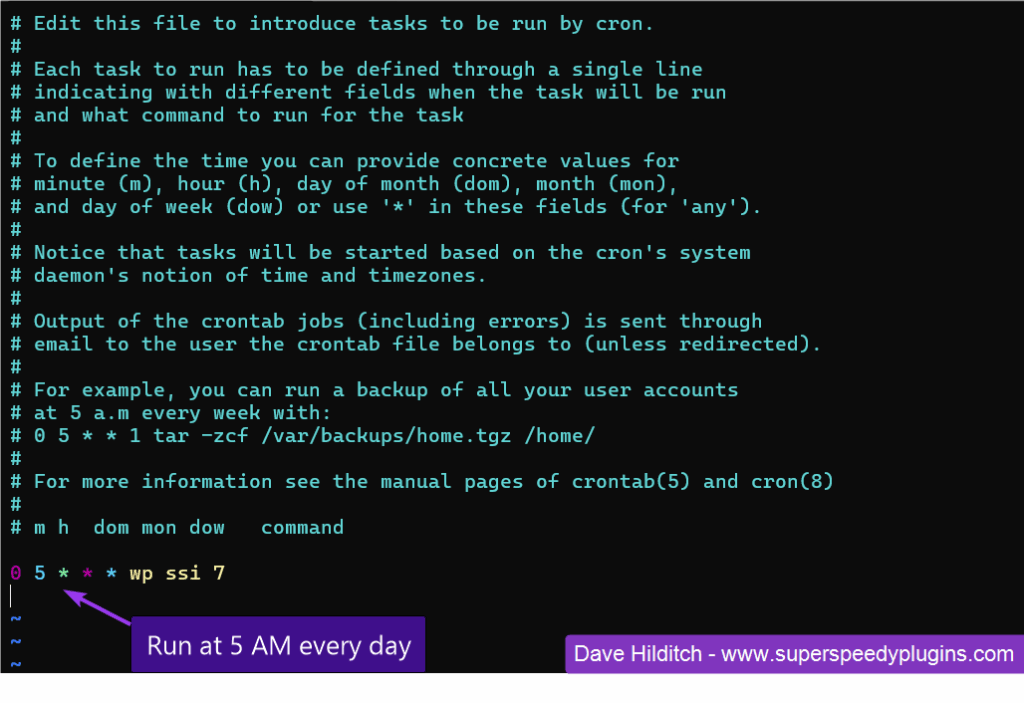
Schedule your imports
Once you have perfected your import, you will want to schedule it.
You can do so using cron. e.g. on your server run: crontab -e (or through your hosts cron manager interface)